RTA cabinets arrive as parts that must be put together before installation. Assembled cabinets arrive with the cabinet boxes already built, although fronts, fittings or finishing pieces may still need work. The useful comparison is how much work each offer includes and where that work will happen.
RTA can reduce the space occupied by unassembled boxes. Assembled delivery can remove some assembly tasks from the receiving team. To determine which option has the lower total project cost, compare the packing details, labor scope and delivery conditions.
Compare the Same Cabinets First
RTA means ready to assemble. It does not mean a particular panel material, door finish or quality grade. Assembled describes the state of the cabinet at delivery, not whether every accessory and site detail is complete.
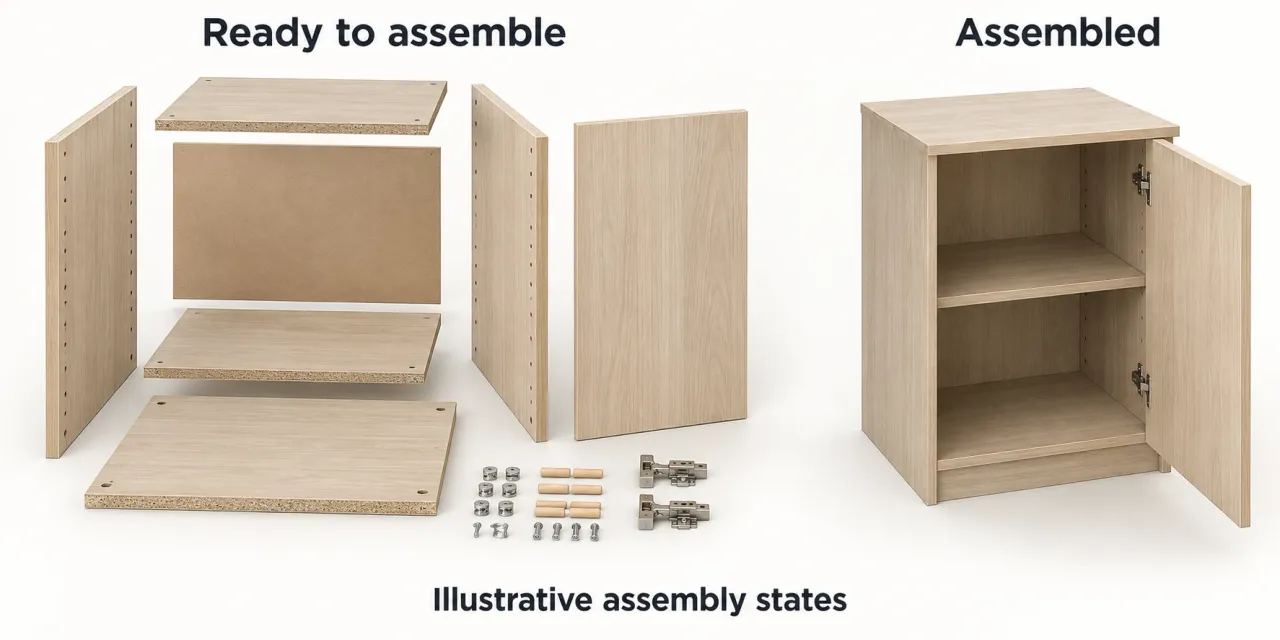
Before comparing the formats, hold the following items constant:
-
Cabinet layout, references, sizes and quantities.
-
Box, back, shelf, door and drawer materials.
-
Finishes, exposed ends, fillers and other finishing pieces.
-
Hinges, drawer slides, handles and storage fittings.
-
The destination and included delivery services.
Use the Component Material Schedule as the baseline. Keep Framed or Frameless Construction fixed too. If an assembled option uses a different box or joint system, record that technical difference before comparing the prices.
Packing Volume Is Only One Part of Handling
Flat-packed panels usually take less space than built boxes. The actual shipment also includes fronts, loose fittings, protective packing and possibly pallets or crates. Large panels and fragile pieces may need different protection from standard cabinet parts.
Compare the proposed packing lists, including:
| Packing information | What the receiving team can do with it |
|---|---|
| Carton or crate dimensions and quantity | Compare the physical volume and plan storage |
| Package weights and handling requirements | Plan unloading and movement through the building |
| Cabinet and room references on labels | Sort the shipment without opening every package |
| Parts grouped in separate packages | Identify what is needed to complete each cabinet |
| Protection for fronts, corners and loose fittings | Review how vulnerable surfaces and parts are packed |
For a shipment-volume comparison, use the outer dimensions of each final shipping unit. Multiply its length, width and height in meters, then add the results to get the total volume in cubic meters. For cartons on a pallet or inside a crate, use the loaded unit's overall packed dimensions; do not also add the cartons it contains. A carton-only total can be kept separately for unpacked storage planning. Ask the freight provider which dimensions and charging basis apply; the sum of carton volumes is not automatically the freight charge.
Also check the route into the building. An assembled tall unit must pass through the actual access route. Flat-packed panels may be easier to move separately, but they still need space for protected storage and assembly.
Separate Assembly from Installation
Assembly builds the cabinet from its parts. Installation positions and secures it in the room, accounts for adjoining cabinets and utility connections, and completes the specified finishing work.
An assembled cabinet may still need to be leveled and secured, with fronts adjusted and handles, fillers and end panels installed. Appliance installation may also need coordination. An RTA cabinet needs those installation tasks as well as the assembly tasks assigned to the receiving team.
Use a responsibility table before ordering:
| Task | Who must be named | What must be agreed |
|---|---|---|
| Assemble boxes and drawers | Supplier, assembly contractor or receiving team | Applicable instructions, included parts, tools and consumables |
| Fit fronts and interior accessories | Supplier or local team | Which items arrive fitted and which arrive loose |
| Check completed assemblies | Person responsible for assembly review | What is checked before the cabinets move to installation |
| Position and secure cabinets | Local installer | Site measurements, mounting conditions and product instructions |
| Complete finishing pieces and adjustments | Named installer or trade | Fillers, end panels, handles, door/drawer adjustment and handover |
RTA assembly methods differ. A product may use screws, locking fittings, dowels, adhesive or a combination. Do not plan the work around a generic claim that every cabinet takes only a few minutes or needs only one tool.
Before the receiving team assembles all the cabinets in a repeated layout, have it build and check one representative unit. This can reveal unclear instructions, mislabeled parts or missing accessories. Agree on who resolves those issues and how updated instructions reach every assembler.
Compare the Cost of the Complete Task
Start with the quoted cabinet and packing scope. Then add the work and services needed to reach the same finished stage for each option.
The comparison should cover:
-
Supplier assembly charges, if separate.
-
Freight, unloading, local handling and storage.
-
Local assembly labor, tools, consumables and workspace.
-
Installation and finishing work.
-
The agreed process and costs for replacement parts or rework.
Do not add assembly labor twice if it is already included in an installer's quote. Even if your own staff assemble the cabinets without a separate charge, allow for the time this takes in the project schedule.
The key question is whether the quoted savings for RTA cover the additional local work for this order. That requires an assembly scope and labor estimate from the team doing the work. A percentage from a different retailer or kitchen layout cannot answer it.
Use the Building-Materials Quote Comparison Template to separate quoted costs from estimates and mark unresolved items. RTA is not automatically the lower-cost option once the work is compared on the same basis.
Plan for Missing and Damaged Parts
Package count and cabinet count are different. In an illustrative shipment, one cabinet might arrive in three packages, while a hardware pack might serve several cabinets. Labels should explain those relationships.
At receiving, compare packages with the packing list and record visible condition. Follow the agreed receiving procedure, including any required notation on the delivery receipt. During unpacking, match parts to their cabinet references and document missing or damaged items before assembly obscures their original condition.
Keep the relevant package label, part reference and photographs with each issue. Agree on the reporting procedure, deadlines and replacement responsibilities before shipment. Do not assume that a supplier's process is the same for visible damage, concealed damage and missing parts.
Confirm how an affected part should be handled before altering it. A replacement also needs a clear cabinet reference, finish and hardware identity so it can complete the intended unit.
Choose the Format Your Team Can Deliver
RTA is worth evaluating when the receiving team has the people, workspace and instructions to assemble consistently, and the packing plan suits the delivery route.
Assembled delivery is worth evaluating when reducing local assembly is valuable and the receiving team can handle and store the built cabinets. Check exactly what remains loose; “assembled” does not remove the need for an installation scope.
For either format, keep the chosen materials and construction in the order documents. Use the Specification Approval Checklist before production, and review the Cabinetry and Wardrobe Page when preparing a project inquiry.